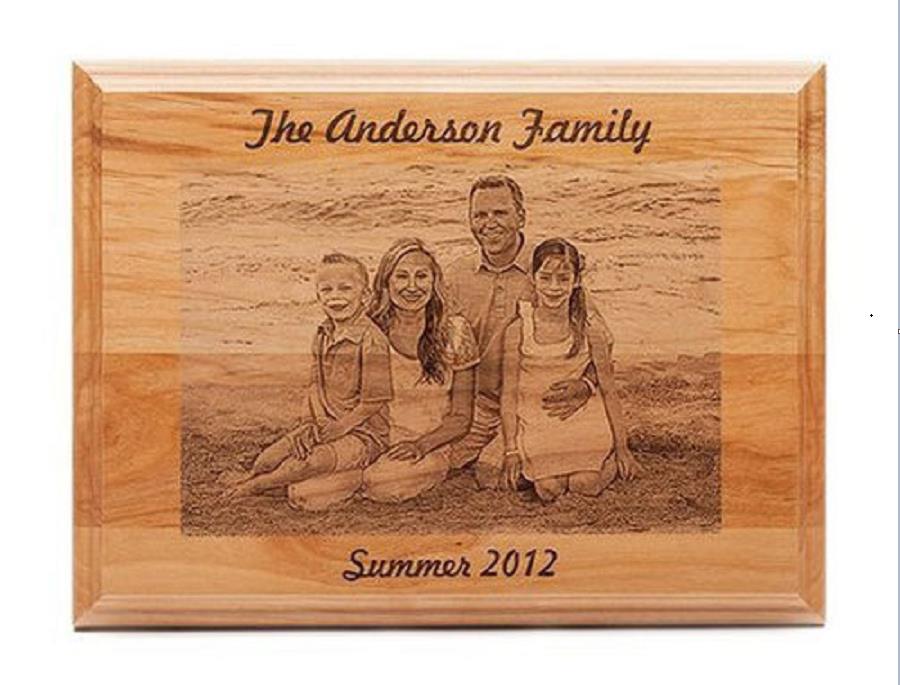
Black White Images for Laser Engraving
How to Laser Engrave Pictures Immortalizing Your Memories
Laser engraving is the procedure of carving a layout right into an item making use of a focused beam of light of power. When you whittle something however is much a lot more specific since it's guided by equipment rather than human hands, the laser acts as a knife does. It additionally produces a lot less waste because of its accuracy. Both of these residential or commercial properties make laser engraving ideal for transferring images to one more surface. You do not shed the important details that make photos the best documents of your best moments with laser engraving. And also, you have a big range of products to select from, consisting of plastics, timber, glass, stone, and steels, which makes the procedure a popular method to produce art as well as precious jewelry. It's just an easy step up to laser engraving your pictures similarly. Laser engraving has a lot of commercial applications, too. It acts similarly, as an accuracy sculpting device that aids with detail job such as cutting interior lenses for machines and including a photo directly onto publishing plates to avoid the film. Laser engraving has actually reinvented all areas of picture reproduction. Read on to take advantage of its simplicity of use and powerful impact! How to Make Laser Engraved Pictures
Picture laser engraving is an excellent method to turn your photos right into customized and practical things. Bring your images into a new dimension with photo laser engraving!
——credit to Cartonus on Instructables
Step 1: Choose a Quality Picture

Use photos in excellent quality. Step 2: Edit Photo into Suitable Size
Open in Adobe Photoshop.

Step 3: Remove Background

Carefully remove the background.
Use Polygonal Lasso Tool (L) Feather 0px, Anti-alias.
Make white background, merge layers (Ctrl+E)
Step 4: Convert Photo to Grayscale
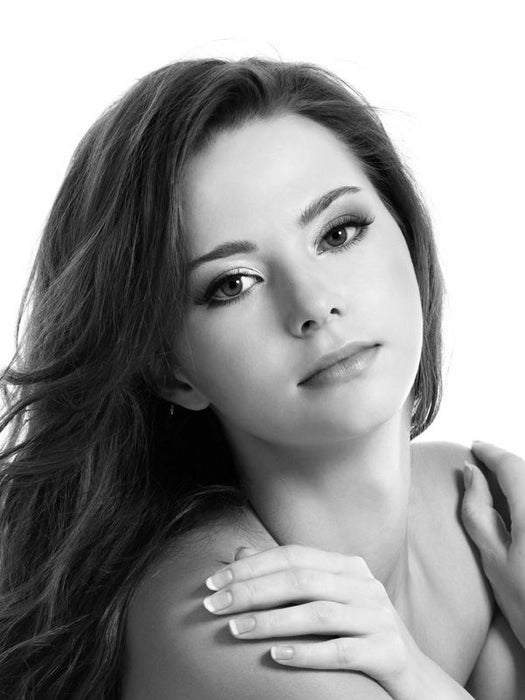
Image > Mode > Grayscale Step 5: Edit Photo

Large dark areas of photos light. Step 6: Image Size Step 7: Sharpen
The intensity of black color on the face should be 10-15%.
The eyes should be almost white. Black 3-6%.
Light hair strands create more light. Dodge Tool (O) Range: Highlights.
Dark hair strands darken. Burn Tool (O) Range: Shadows.
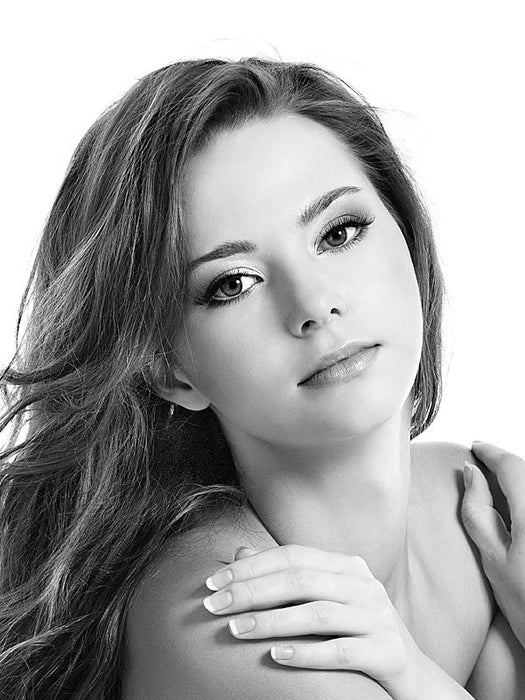
Filter > Sharpen > Unsharp Mask Step 8: Convert Image to Bitmap Image > Mode > Bitmap Step 9: Laser Program Import BMP image to RDWorks (or other your laser program). Step 10: Hit "start," and watch your creation come to life Tips and Cautions on Laser Engraving Pictures
Amount: 200 % Radius: 1 pixels Threshold: 0 levels.
Make sharper eye, eyelashes, eyebrows, lips, hair using Sharpen Tool.
Output: 200 pixels/cm (508 pixels/inch)
Method: Halftone Screen Frequency: 200 lines/cm (508 lines/inch)
Angle: 15 degrees
Shape: Round
Save As Format: BMP File
Format: Windows
Depth: 1 Bit
Wood fibers should be parallel to the long axis (X).
Image as well.
Rotate image 90 degrees if necessary.
Set parameters for engrave
Parameters for 40 watt power laser (Program: RDCAM)
Speed(mm/s): 300 Max
Power(%): 20
Interval(mm): 0.05
Material: solid birch, plywood birch
Speed and power must be chosen by experimentation.
Do a test engraving whenever you alter your picture setups. Scan your pictures in color. Exclude large areas of single shades and extensive histories with a couple of little topics.
As you enter the swing of laser engraving your pictures, you may be lured to avoid this. Do not! Also, small changes in picture settings can make huge differences in your ended up project. For example, changing the tone contrast between the light and also dark locations on your image makes its slopes look sharper or softer. When these settings more than a range instead of on/off, those same steady modifications go into your inscriptions. But you will not know specifically just how that translates to the particular product and image you're using until you check it to ensure it matches your scheduled vision.
Dealing with checked images is equally as very easy as collaborating with pictures you've directly submitted from an electronic camera. If the original's in black as well as white (that's possible on the majority of scanners), just make sure you check in color even. The added info from the shade provides you more to collaborate with when you're preparing the picture.
Neither kind of photograph section offers laser engravers enough info to make a clear copy. If you have a photo with a large solid tinted history however a diverse foreground that would etch flawlessly, change the background with a white or clear layer in your picture editing software.
Highlights of Laser Engraving Pictures
Preservation: The durability of pictures has tremendously reduced symmetrically to how easy it is to take them. Since we all have electronic cameras in our pockets, we can save whatever we shoot-- that is up until our phone dies, or our SIM card obtains harmed, or we forget our password one a lot of times and also are locked out of our cloud makeup 47 years ... (We might be a little bitter regarding that last one from individual experience ...) Even photo prints aren't as difficult as the ones from previous generations, so laser engraving your pictures offers an extremely strong alternative to conserving your priceless minutes. And also, you do not also have to worry about a framework.
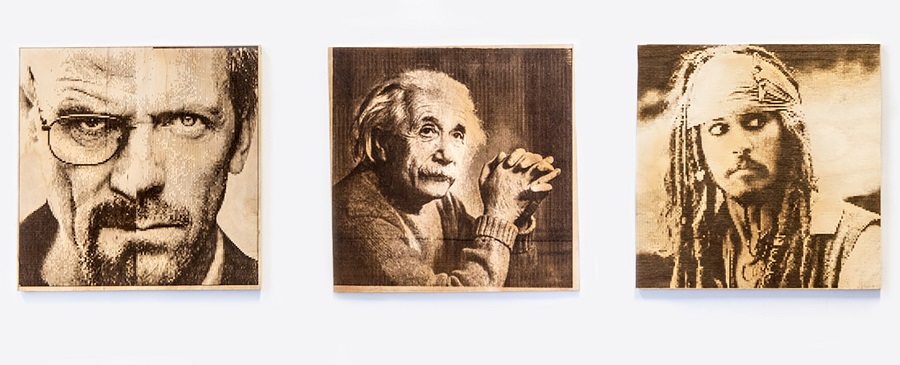
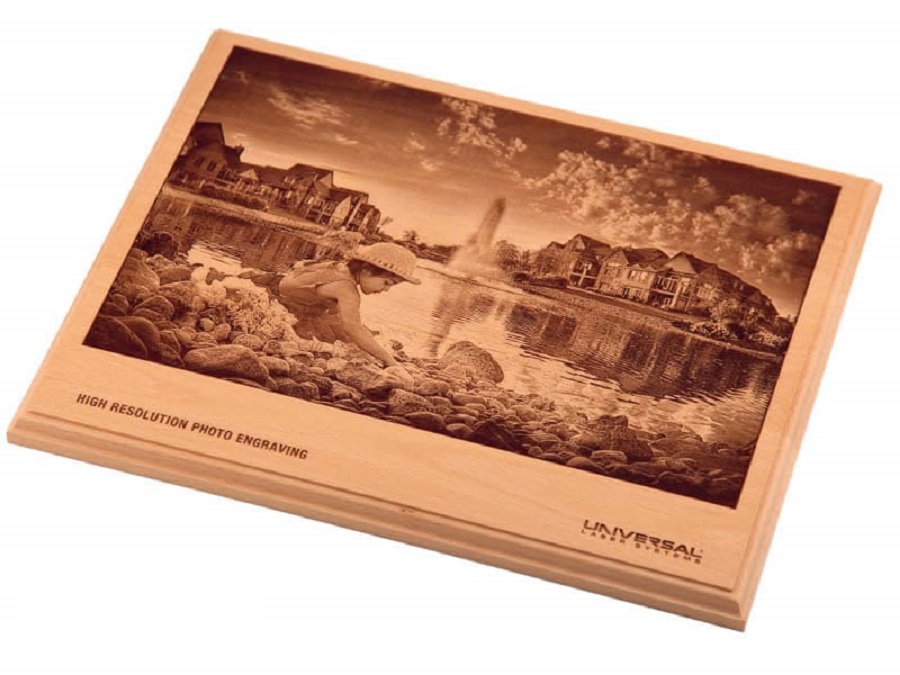
Information and variety: Because of its precision, laser engraving allows you to generate art that keeps the level of information you had in the original shot. Keeping that kind of clarity, broadening your profile is as simple as buying a laser engraver. Replicating the exact same picture onto different materials will certainly bring out different aspects that you can play up or down as your creative mood suits you. Laser engraving your pictures really allows you to explore photography in methods Photoshop cannot.
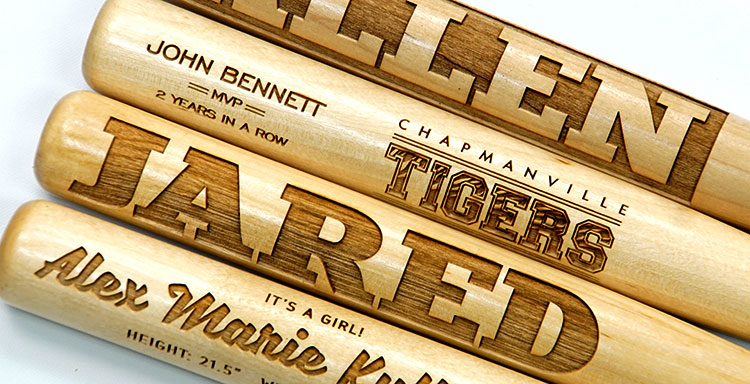
Gifting: In addition to keeping your images safe, laser engraving them looks really great. That, coupled with the capacity to use it on practical or decorative items, such as precious jewelry, plaques, bookends, as well as paperweights, gives you limitless choices to make your finest memories a lot more congratulatory.
Recommended Laser Engraving Machine Clear, legible, and permanent engravings are left that can be easily read by both humans and machines, making them perfect for whatever applications they're used for. Whether it's to create aesthetically appealing personalization engravings, or if it's to create traceability codes for machines to scan, laser engraving ensures that quality is never sacrificed.
If you don't have a laser engraving machine yet, the Creality CP-01 shall be a great choice for your first shot at entry-level. The Creality CP-01 is a 3-in-one modular machine integrating 3D printing, CNC carving, and laser engraving. As a CNC machine, the CP-01 can sink its bit into plastic, wood, paper, and PCB. Compatibility with soft metals like aluminum isn't explicitly mentioned, but with a frame and spindle-like this one, we wouldn't bet on it. Nevertheless, you've got a 200 mm square area to machine other materials with the 4,800-rpm spindle. With a laser rated at less than 0.5W and an engraving area of 100 x 190 mm, it's still sufficient for the occasional coaster or desktop ornament.
Black White Images for Laser Engraving
Source: https://www.creality.com/blog-detail/laser-engrave-pictures-immortalizing-your-memory
0 Response to "Black White Images for Laser Engraving"
Post a Comment